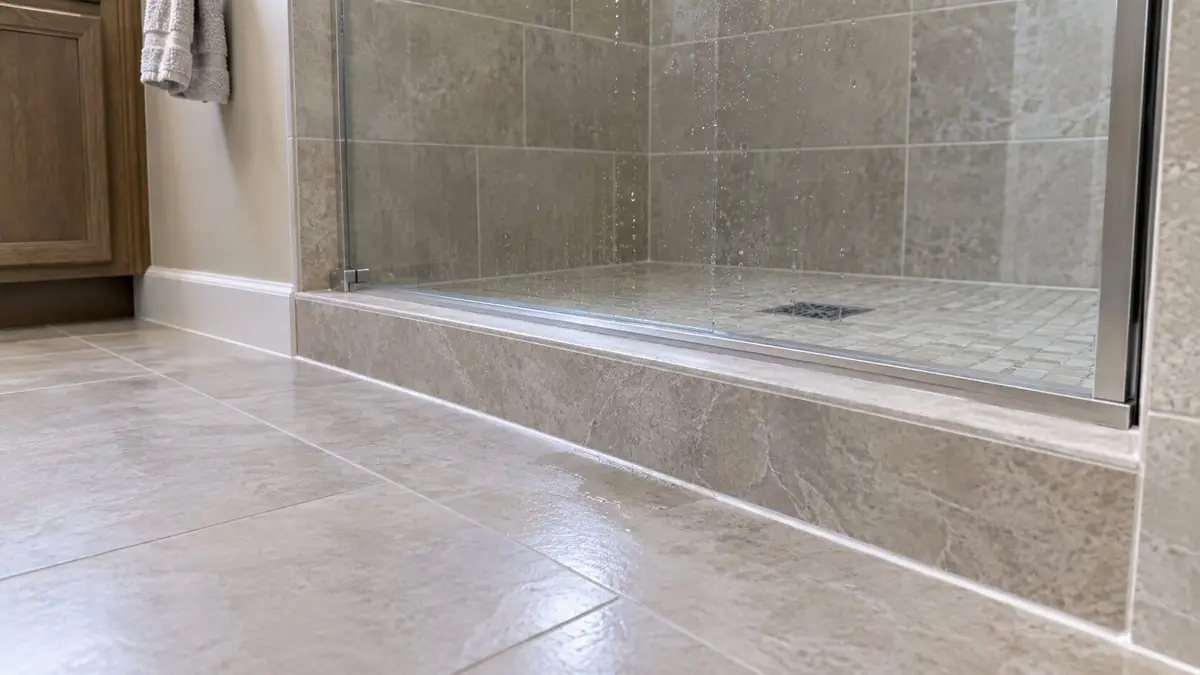
The fresh caulk looks intact, yet water appears beside the curb (the raised threshold you step over) or on the ceiling below. That spot tells you where water became visible, not necessarily where it entered the assembly. Another bead may cover the clue without reaching the defect.
The question is which part failed and whether a repair can connect to what stays.
When does a shower that leaks after recaulking need a rebuild?
A rebuild becomes a serious option when a tile professional identifies failed hidden waterproofing, damaged support, or a partial repair that cannot connect to the parts that stay. A specific pipe, drain connection, or door defect can instead support a narrower repair. A failed caulk attempt alone proves neither result.
No reliable national price separates these repairs: the cost follows which part failed, how much has to be opened, and what damage turns up behind it. Price it from written local quotes once the source is confirmed.
Stop using a shower that is actively leaking while arranging assessment. EPA recommends drying wet materials within 24–48 hours after a leak or spill.
The National Tile Contractors Association’s consumer leaky-shower guidance, previewed in 2022, gives the order. First, a plumber checks the shower valve, the pipe to the shower head, the supply lines, and the drain and trap. Second, the shower-door installer checks the door track (its screws can pierce the curb), the sweep under the door, and the joints between frame, wall and door. Then a qualified tile professional evaluates the shower itself. The same guidance warns that grout, caulk, sealer, or coating will at best be a temporary fix.
Conditions that need prompt professional help
If a ceiling sags or a floor feels unstable, keep people clear until a structural engineer and water-damage restoration professional assess it. A plumber must identify the leak source. Expanding wet areas or active ceiling drips also need prompt plumber and restoration-professional help. Water around lights, outlets, or wiring needs urgent electrician and plumber assistance; do not touch wet equipment or enter water to reach a panel. CPSC’s home electrical safety checklist warns that water and electricity together can mean a serious shock or fire hazard.
Kohler’s pivot-door instructions warn that damaged or improperly handled glass can shatter. A glass professional should assess the enclosure; a homeowner should not adjust or dismantle it to look behind the jamb. If you suspect dampness or mold hidden in a wall, floor or ceiling, bring in a water-damage restoration professional experienced with hidden moisture rather than opening it yourself. EPA’s residential mold guidance warns that disturbing hidden mold can release spores, and says the water problem must be fixed before any cleanup counts as finished. For a soft floor, see how to tell whether a soft spot is the floor covering or the subfloor.
Why recaulking or regrouting may leave the leak unresolved
Caulk seals a few visible joints. Tile and grout do not make a shower waterproof by themselves; Schluter’s shower-system brochure says so plainly. Water gets past them, and a separate waterproofing layer under the tile has to catch it and carry it to the drain. That layer, its connection to the drain, and the support beneath it are what a new bead of caulk never reaches.
The new bead itself can also be the problem. GE’s 2020 data sheet for its Advanced Silicone 2 kitchen-and-bath sealant, for example, says to remove dirt, grease, moisture, soap residue and old caulk first. It allows water after 30 minutes only for a bead of 3/16 inch or less, at 65°F and 50% humidity or higher; otherwise the wait is 8 hours. Other products set their own conditions, so check the label of the caulk that was used. EPA says not to caulk over moldy surfaces.
Extra caulk is not always harmless. Kohler’s instructions for one pivot shower door tell the installer to follow its sealant steps closely, and warn that sealing areas other than the ones shown may cause leaking. Find the installed door’s model instructions before anyone reseals it.
Which shower pan assembly is leaking?
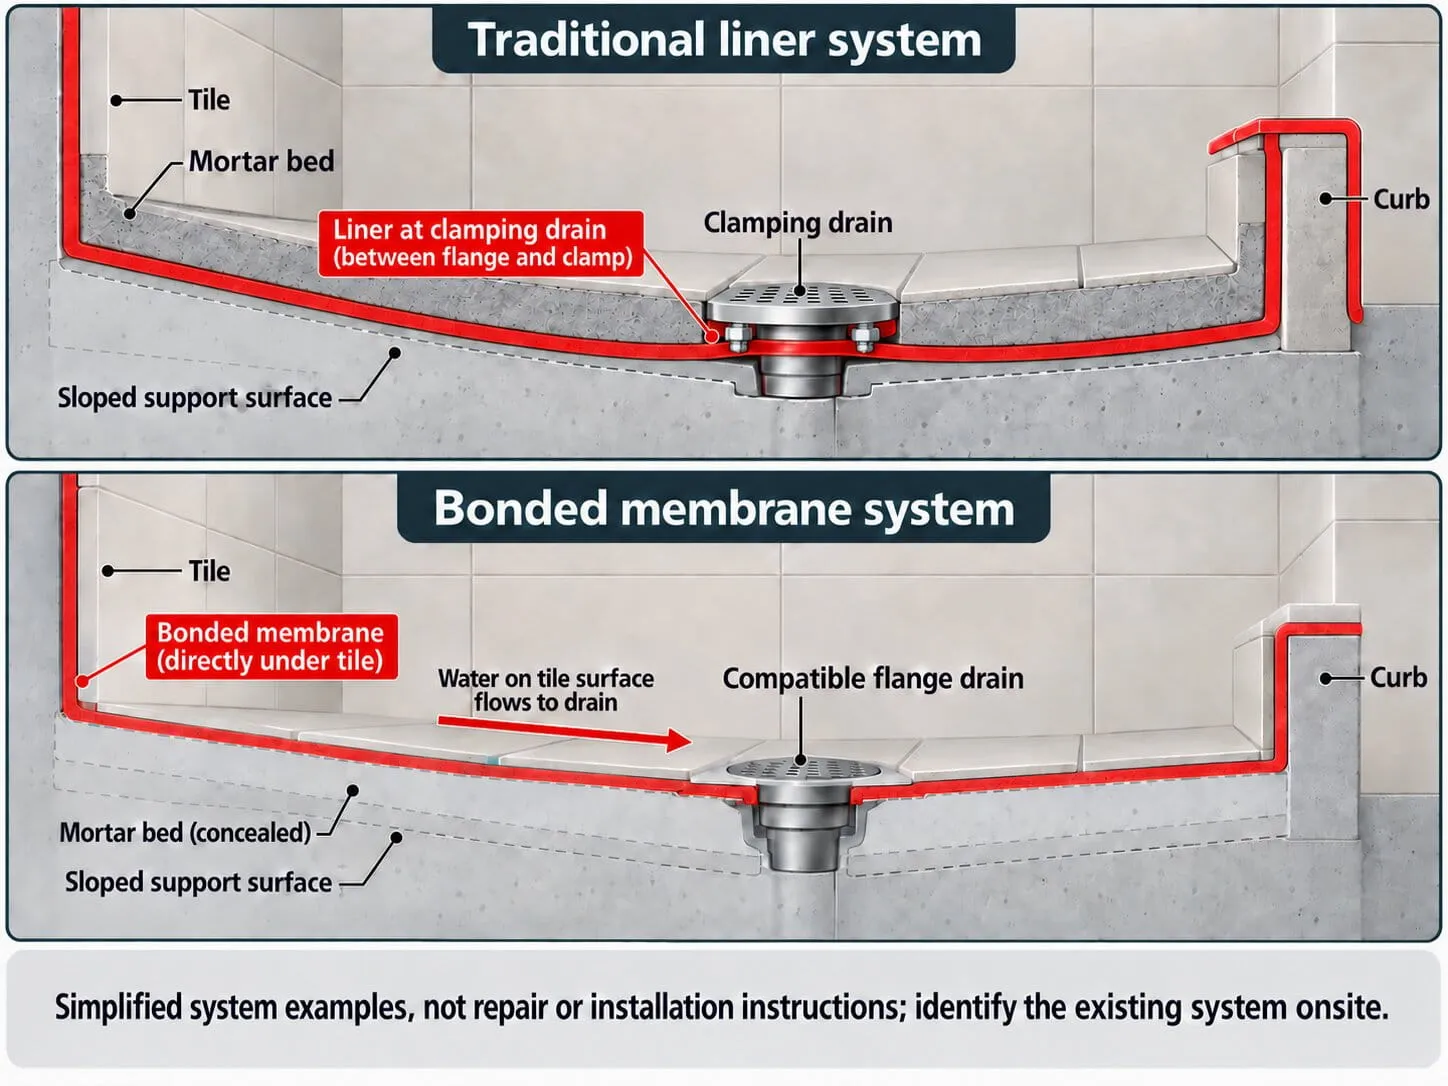
In a traditional tiled shower floor (the shower pan), a waterproof sheet called a pan liner lies on a sloped base, under a bed of mortar that carries the tile. The liner is clamped into the drain below that mortar, in what is called a clamping drain. Oatey’s shower-pan liner guide shows those layers, and a flood test of the liner before it is covered. A bonded waterproofing system instead puts its membrane directly under the tile and bonds it to a drain made with a bonding flange, as Schluter’s brochure describes. The two are repaired differently, so a quote to “patch the pan” is incomplete until it says which one you have.
A factory-made shower base (a receptor) needs its own model instructions. Do not assume the board behind the tile is waterproof: Oatey’s guide to common shower-installation errors notes that many boards are only water-resistant. And the finished tile does not reveal which system is underneath.
Simplified system examples, not repair or installation instructions; identify the existing system onsite.
Record where water appears without recreating the leak
From a dry, safe position, photograph what has already happened. Note the first noticed date, location, whether it appeared during or after normal use or while unused, and what an earlier caulk repair changed. Gather installation photos, product labels, test records, and the caulk product and waiting time if known.
| Observation already noticed | Who checks what | What it cannot establish |
|---|---|---|
| Water near the door or outside curb | Shower-door installer: track screws, sweep, frame joints. Tile installer: curb waterproofing | That the concealed pan is sound |
| Stain or drip below or behind shower | Plumber: valve, shower-head pipe, supply lines, drain and trap. Then tile installer: waterproofing | The source from stain position alone |
| Cracked joint, loose curb tile, or movement | Tile installer: support and waterproofing | Rot or a mandatory full rebuild |
| Persistent dampness, discoloration, or odor | Tile installer: drainage. Restoration professional: hidden moisture | Exact leak source or mold identity |
Do not spray corners, plug or fill the pan, cut deeply into caulk, remove tile, dismantle the drain, or enter an unsafe crawl space.
Natural-stone tile can darken with moisture even in a shower built to industry standards. In a June 2024 technical Q&A, NTCA’s technical team said the cause of that discoloration is not yet known, so darkening alone does not show a leak. Tell the tile professional whether the darkening has changed, where it occurs, and whether water shows up anywhere else.
Ask the professional to identify the failed part and repair boundary
Work through the trades in NTCA’s order: a plumber first, then a shower-door or glass specialist, then a tile-shower installer or remodeler experienced with the waterproofing system you have. Ask whether they are licensed where required and insured, and check references. CTEF-certified installers have been evaluated by an industry program.
Ask for a written account of the observed defect, evidence supporting it, areas not yet examined, and what the proposed opening would accomplish. Is that opening diagnostic, or already part of the promised repair?
What a waterproofing assessment must resolve
The tile specialist should identify the existing system, its drain connection, transitions, corners, penetrations, drainage, and the condition of the surface under the waterproofing. Then ask how a new section would join the layer that stays and whether that connection is reachable in the finished shower. Oatey says movement from an unstable subfloor will most likely make a shower fail. The Ceramic Tile Education Foundation warns that connecting products not designed to work together leads to failure. Its example is a pan liner joined to a different kind of membrane, which leaked onto the ceiling below.
Ask the tile specialist what any controlled test or opening covers.
Compare targeted repair, pan rebuild, and complete shower rebuild
Start from the confirmed defect. These choices are a planning framework: no number of failed caulk beads triggers demolition.
| Proposed scope | Evidence that could support it | Question before approval |
|---|---|---|
| Door, plumbing, or drain-connection repair | Specific defect identified | How was other damage assessed? |
| Local waterproofing repair | Known system and applicable repair detail | Can the detail be made in this finished assembly? |
| Pan or curb reconstruction | Retained wall connection can be designed | How will new waterproofing join wall and drain? |
| Complete shower rebuild | Widespread defect or no supportable partial connection | What finding requires each area to come out? |
Schluter says a hole poked in its KERDI membrane during installation can typically be repaired with a patch that overlaps the hole by 2 inches in every direction. That is a known product and a bare, reachable membrane, not a finished shower nobody has identified.
Why preserving the walls may be the difficult part
Wall tile that looks perfect can sit on top of the connection a new pan needs. In a traditional shower, Schluter’s brochure explains, the pan liner is carried over the curb and a few inches up the walls, and the wall’s moisture barrier laps over it. That overlap sits behind the bottom of the wall tile, out of reach from the shower side.
Replacing only the pan is a recognized repair, not a shortcut. In its June 2024 Q&A, NTCA’s technical team said the Tile Council of North America Handbook’s pan-renovation method (TR420) can be very difficult to achieve. Nobody knows what is behind the walls, or how well it was built, until the shower is opened. Many contractors and installers, the team added, may agree that a full tear-out is the best practice for a leaking shower. That is a judgment about risk, not a code rule. Ask a contractor who proposes a pan-only repair to draw how the new waterproofing ties into the walls. Ask to see the membrane maker’s written instructions for that repair, and what the warranty covers on the parts that stay.
Concealed damage can change the scope once opened. In an older house, ask before anything is opened whether the contractor will check that the materials to be disturbed do not need hazardous-material precautions. Agree in advance on how findings, photos, revised work, price, and schedule will be authorized. Keep optional upgrades separate from leak repair. If replacement is necessary, compare prefab showers and custom tile against the agreed repair scope.
Make the estimate describe concealed work as well as tile
Ask each bidder to itemize:
- Diagnosis, access, demolition and disposal
- Plumbing and subfloor or framing repair, if needed
- Waterproofing and drain work
- Tile and glass
- Drying or remediation and adjacent ceiling, wall, or floor restoration
Mark what is included, excluded, or an allowance for conditions known only after opening. If this is your only bathroom, plan toilet and shower downtime before work starts.
Ask who coordinates the trades, which product instructions govern the system, and who confirms locally required permits or inspections for this scope. Request separate written workmanship and product warranty terms, including how retained parts are treated. No standard warranty length applies, so the written terms are what count.
Get another qualified opinion when proposals disagree substantially about what can remain or a full tear-out is recommended without an explained failure. Be wary of a coating or another caulk bead offered as the fix, and of certainty about concealed conditions before any assessment. Be just as wary of a connection between old and new waterproofing that nobody can draw or document.
Confirm the repair and dry-out before returning to use
Oatey’s guide includes a flood test before a traditional liner is covered; let the contractor use the appropriate professional verification for the actual system and local requirements. A flood test checks the pan at that stage, not every other shower component.
Have the contractor identify the installed waterproofing, mortar, grout, and sealant products and when each product can get wet. Water-ready and fully cured are not interchangeable.
Resolve the leak source and dry affected materials before damaged areas are closed. EPA recommends prompt drying after a leak or spill. Obtain maintenance instructions and a contact for any renewed dampness. Return the shower to use only after the contractor who made the repair confirms it is ready and whoever dried the damaged area confirms it is dry.
Frequently asked questions
How can a professional assess a leaking shower built over a concrete slab?
From inside the shower and the rooms beside it, because there is no ceiling below to inspect. A plumber and a tile professional identify accessible details, then choose any targeted testing or opening appropriate to the installed assembly. Ask what each proposed investigation will reveal and what restoration follows.
Can the existing glass enclosure be reused after a shower rebuild?
Possibly, if the glass specialist and builder confirm its condition, dimensions, attachment, and compatibility with the rebuilt curb and walls. Do not assume retaining glass is cheaper until removal, storage, reinstallation, and fit are included in the quote.
Does natural-stone tile darkening after use mean the shower is leaking?
Not by itself. NTCA’s technical team says stone can discolor this way even in a correctly built shower, and that the cause is not yet known. Record where and when it appears and whether water also shows outside the shower; have a qualified tile-shower installer assess the shower if dampness persists or spreads.
What should I document if a recently remodeled shower leaks while the original installer is involved?
Photograph visible water and damage, record dates and prior repair attempts, and keep the contract, product list, installation photos, inspection records, and written communications. Tell the installer the shower is out of use and request a written diagnosis and repair plan that identifies who is responsible for the parts that stay. Warranty or contract rights depend on the actual documents and local law; avoid approving another surface-only fix before the source is explained.
Sources
- Schluter — Shower System Brochure
- Oatey — How to Install a Shower Pan Liner
- Oatey — Shower Installation and Waterproofing Errors
- Kohler — Pivot Shower Door Installation Instructions
- GE Sealants — Advanced Silicone 2 Product Data Sheet
- NTCA via TileLetter — Consumer-targeted leaky shower documents
- NTCA via TileLetter — Stone Tile and Shower-Pan Repair Q&A
- Schluter — KERDI Puncture Repair FAQ
- Ceramic Tile Education Foundation — What Do You Need to Install Tile in Wet Areas?
- U.S. EPA — A Brief Guide to Mold, Moisture and Your Home
- CPSC — Home Electrical Safety Checklist