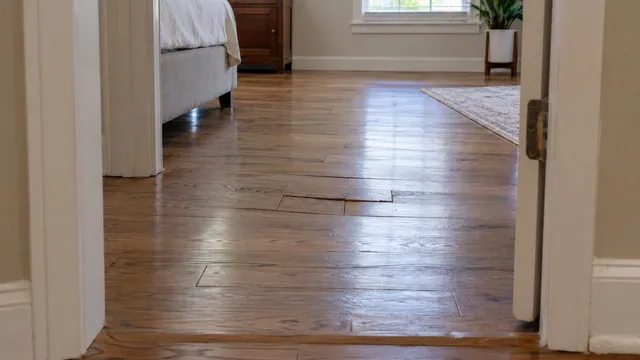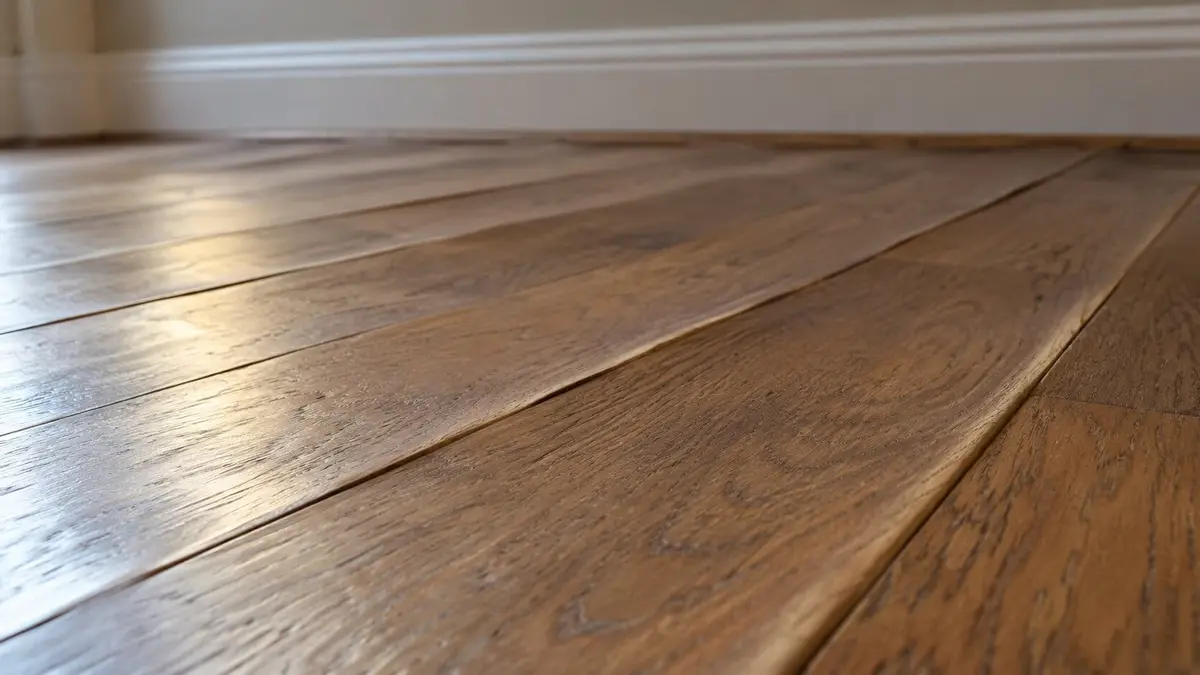
Hardwood floor cupping makes the edges of several boards catch the light while their centers sit lower. That shape may seem like a finish problem, but sanding changes the wood permanently. A floor that looks dry on top can still be changing deeper down.
The useful question is what conditions the boards and the materials beneath them have experienced. A location map, a few records, and a measured floor assessment can separate a repairable finish issue from moisture that still needs attention.
First, check whether this is cupping—and whether anything needs urgent attention
Look across an individual board from a safe, dry position. Cupping means its two long edges are higher than its center. Often the wood lower in the board holds more moisture than the face and swells more, lifting the edges. That imbalance alone does not show where moisture entered. Crowning is the reverse: the center is high. Buckling means flooring has lifted away from its support. These shapes describe what happened to the floor; none identifies where moisture entered. The National Wood Flooring Association’s problem-prevention guidance explains the cupped shape, and its moisture demonstration shows the high-center crowning that follows sanding while the underside is still wetter.
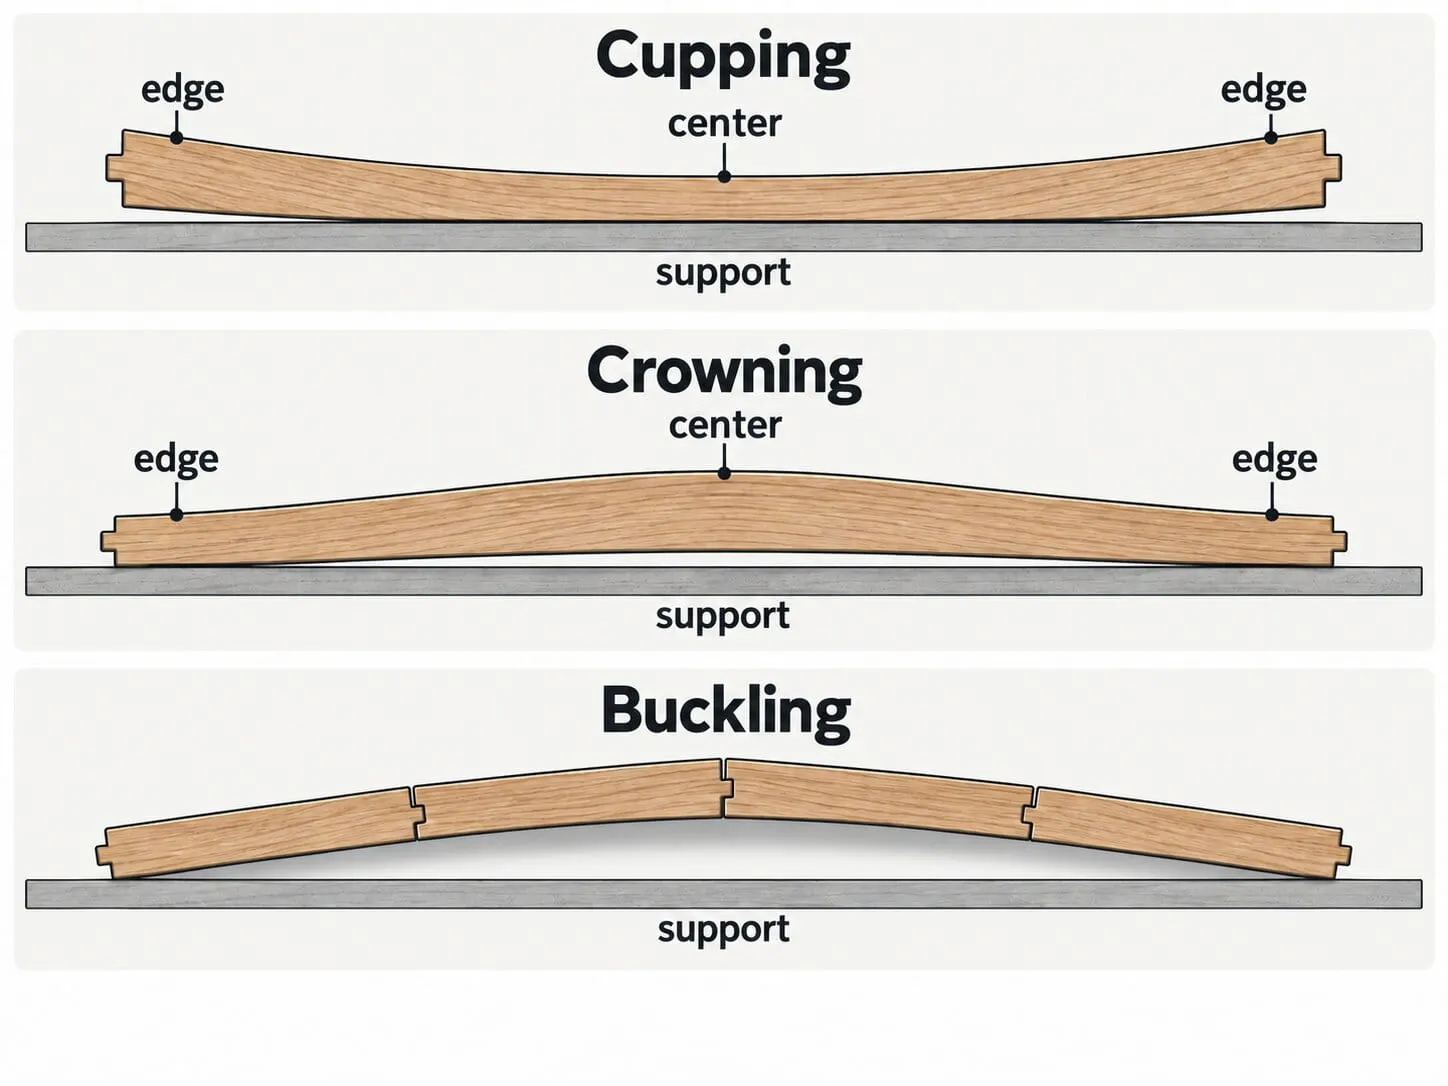
Shape describes the symptom; it does not locate the moisture source.
Take a broad photograph and a close view in consistent light. Do not test a raised board by pressing it down. A photo records its appearance, but cannot show attachment, moisture at depth, or the condition below it.
If water is still arriving, make source control the priority. A suspected supply or drain leak calls for a plumber; an appliance leak calls for an appliance service professional. Keep people away from loose, lifted, or visibly unstable boards. With flooding, possible sewage, water near electrical equipment, or suspect support, do not enter the area to inspect the flooring or reach a breaker through water. The EPA’s flooded-home guidance calls for qualified attention to electrical, structural, and contaminated-water hazards. Mild, dry-looking cupping without those signs allows an orderly investigation, but it is not permission to sand.
Use the location and timing to decide what to investigate next
Mark the first day you noticed a change. Note recent leaks, cleaning changes, HVAC interruptions, renovations below the floor, installation, and refinishing. Use the pattern to focus the investigation.
| What you see | Investigation to prioritize | What it cannot establish |
|---|---|---|
| Change near an appliance, bathroom, or exterior opening | Plumbing, appliance, or building-water source | That the closest appliance caused it or damage stops at its edge |
| Several rooms change around humid weather or an HVAC interruption | Indoor conditions and the assembly below | That room humidity alone explains every board |
| Wood over a crawlspace or basement | Moisture and air pathways below | That opening vents or adding a dehumidifier will fix it |
| Wood over a slab | Concrete moisture and the installed control layers | That a surface-dry slab is dry beneath the wood |
| Change after installation or refinishing | Product, earlier readings, and work sequence | Fault, warranty coverage, or a defective product |
Humid outdoor air can add moisture to a cool crawlspace. That is why Building Science Corporation’s crawlspace analysis does not support a universal “open the vents” answer. Its slab case studies also show why an exposed surface is a poor window into a covered concrete assembly.
If it is engineered wood, include excessive dryness in the investigation
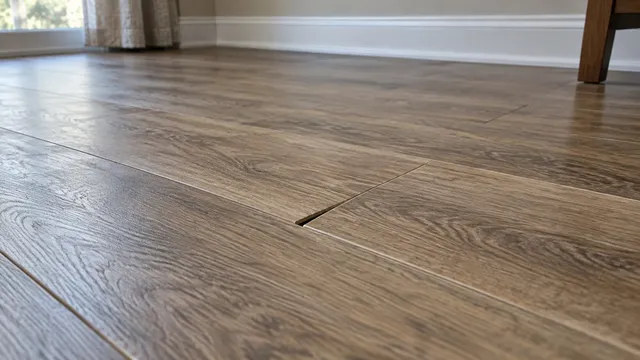
Engineered wood uses a wood face over a built-up core. Its construction differs from a solid board, so the same visible curve can call for different questions. NWFA’s technical discussion of engineered-floor failures describes dry cupping after prolonged conditions below a product’s humidity recommendations. It also distinguishes types of layer separation that a photograph cannot settle.
Find the receipt, spare board, carton, or product instructions. If the floor is unknown, ask the inspector to identify it. Do not increase dehumidification merely because you see cupping, and do not add humidity blindly either. NWFA suggests 60–80°F and 30–50% relative humidity for many wood floors; the installed product’s own range governs. Compare measured room conditions with that guidance. Splits or separating layers increase the need for that product-specific inspection.
Gather a useful record without opening the floor
Sketch the affected rooms and mark each cluster. Keep dated photos from the same angle, leak-repair records, installation paperwork, and a note of any products used to clean the floor. Record whether the pattern is expanding, holding steady, or improving. A floor that has looked unchanged through more than one season still needs measured evidence before irreversible work.
A room hygrometer can record temperature and relative humidity at the time of each visit. It measures air, not the moisture content of wood or the slab. Keep a seasonal log so an inspector can compare readings over time. If you already own a consumer moisture meter, keep its model, mode, and reading location with your notes. Do not drill, drive long pins, or declare the assembly dry from one number. Moisture-meter guidance published by Hardwood Floors magazine explains that settings, species, depth, and material beneath the surface affect interpretation.
From ordinary accessible areas, note visible plumbing water or stains. An odor is worth reporting but does not prove mold. Leave moving appliances, opening the floor, and wet or confined-space entry to qualified people. For a small routine spill in an electrically safe area, wipe it promptly according to the floor’s care instructions; NWFA maintenance guidance warns against wet or steam mopping. A flood requires a different response.
Ask the professional to test the floor assembly, not just its surface
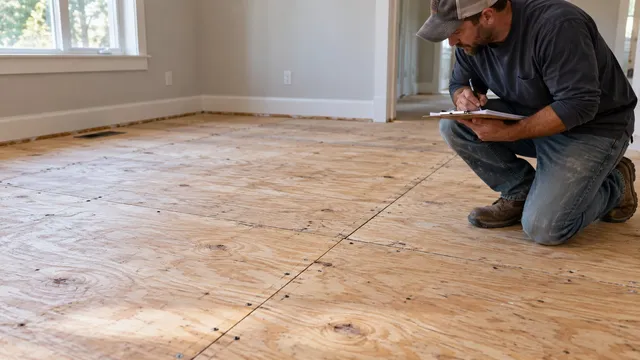
A wood-flooring professional experienced in moisture investigation should identify the flooring and installation method, map affected and unaffected areas, and evaluate the relevant substrate and surrounding materials. NWFA’s water-damage guidance calls for looking beyond the visible boards and interpreting conditions relative to the floor’s expected use.
Pinless scanning can locate differences across an area. Properly chosen insulated-pin readings can examine wood at different depths. Neither method turns one display into a verdict: a pinless meter’s sensing field may include material under the board. Ask for a written record of test locations, date, material, instrument and mode, ambient conditions, interpretation, and planned follow-up.
Crawlspaces and slabs need different investigations
For a crawlspace, ask how drainage, ground cover, air leakage, and cool surfaces affect the space below this floor. A single dry visit does not erase an earlier wet period. A moisture or building-envelope specialist should design any correction for the actual climate and assembly.
For a slab, ask how concrete moisture and any installed moisture-control layer will be evaluated. A room hygrometer or wood meter cannot substitute for the testing required by the flooring and adhesive system. Agree on the purpose, location, and restoration of any opening before work begins.
If there was a water-loss project, put the restoration contractor’s readings and the flooring contractor’s requirements in the same discussion. General drying completion can differ from what the particular wood floor needs before finishing. If the two contractors disagree, request both criteria and their measurement records in writing rather than choosing a calendar date.
Can you sand a cupped hardwood floor, and when?
Four questions belong in the decision, in order:
- What source was found, and how was it corrected?
- What do repeated, material-appropriate measurements say about the wood and underlying assembly under expected service conditions?
- What distortion or material damage remains after conditions stabilize?
- Which repair fits the product and its remaining usable wood?
An unresolved first question sends the project back to investigation. A visually flat surface, running fans for a month, or one low reading cannot answer the second. NWFA’s cupped-floor demonstration shows why moisture at depth can remain different after the surface feels dry. Sand the raised edges while the wood beneath the face is still wetter, and the boards will crown as they finish drying: the edges cut down end up lower than the centers.
Ask the flooring professional what follow-up measurements will establish stability for this floor. Do not accept a universal number of days or a generic percentage as sanding clearance. An independent wood-floor inspector is useful when the source is unidentified or two proposed treatments conflict.
Will a cupped floor flatten on its own, or does it need sanding?
Some cupped floors flatten enough as the source is corrected and the wood dries that no shape correction is needed. Others retain distortion after moisture stabilizes. The first photograph cannot tell which outcome applies. A stable solid floor may be a sanding candidate if its condition and remaining wood allow it; engineered flooring needs particular care because the face layer can be thin. NWFA’s refinishing guidance distinguishes a maintenance coat, which renews finish, from resanding the wood surface.
Loose or buckled boards, damaged substrate, and separated engineered layers can change the scope to selective or wider replacement. Ask what evidence defines the affected extent. One damaged area does not automatically condemn the whole house. If the substrate feels soft, the soft-spot guide addresses that separate investigation. Once moisture is stable, the refinish-or-replace guide helps assess wear and remaining wood. If your main issue is horizontal spaces rather than raised edges, use the hardwood-gap decision guide to track seasonal movement separately.
Compare estimates by investigation, drying, and repair scope
Have each proposal separate source diagnosis and correction, moisture monitoring, access or drying, flooring repair, finish work, and restoration of trim or nearby finishes. Ask who will declare readiness and what records you will receive. The area that needs finishing for an even appearance can differ from the area that needed moisture repair.
No reliable national price range describes this combination of floor construction, hidden access, damage, and finish matching. Compare local written estimates that state the assumptions: solid or engineered wood, attachment method, access below, matching stock, monitoring visits, and what happens when concealed damage is found. A sanding date offered before readings, or fault assigned from photos alone, deserves a clearer explanation or a second opinion.
Keep the product’s care and environmental instructions after the repair. If the cause was corrected below the floor, request a record of that work as well as the finish receipt. The next useful step is a measured floor assessment with your location and timing log in hand.
Frequently asked questions
Can newly noticed cupping be related to earlier installation or refinishing work?
Yes, the timing makes those records relevant, but it does not prove fault. Ask the inspector to compare the product, method, earlier conditions, and present assembly findings before anyone assigns a cause or warranty responsibility.
What records should I request if the installer and drying contractor disagree?
Ask each for dated locations, materials tested, instruments or methods, results, and the criteria they used to recommend the next step. Have them reconcile those findings against the installed wood product before scheduling sanding.
Can a maintenance coat level a cupped floor?
No. A maintenance coat renews the finish; it does not remove the board’s raised-edge shape. If the shape remains after the moisture condition stabilizes, ask whether sanding is feasible for that exact floor and whether any material needs replacement.
What if the cupping looks unchanged through humid and dry seasons?
An unchanged shape is not proof that the wood has dried through. Have a wood-flooring professional compare moisture readings at suitable depths in affected and unaffected boards and check the materials below. If the source is corrected and repeated readings show stability, a still-cupped floor may be a sanding candidate if its construction and remaining wood allow it. There is no fixed waiting period that substitutes for those measurements.
Sources
- National Wood Flooring Association — Problem Prevention
- NWFA / Hardwood Floors Magazine — Hardwood Hints: Measuring Moisture on a Cupped Floor
- NWFA / Hardwood Floors Magazine — Failures Unique to Engineered Wood Flooring
- NWFA / Hardwood Floors Magazine — Assessing and Addressing Water Damage
- Hardwood Floors Magazine — Tips to Manage Your Moisture Meter
- Building Science Corporation — BSI-009: New Light In Crawlspaces
- Building Science Corporation — PA-1904: How to Look at a House like a Building Scientist (Part 4: Water)
- U.S. Environmental Protection Agency — Text Version of the Flooded Home
- National Wood Flooring Association — Refinishing Your Floors
- National Wood Flooring Association — Maintenance